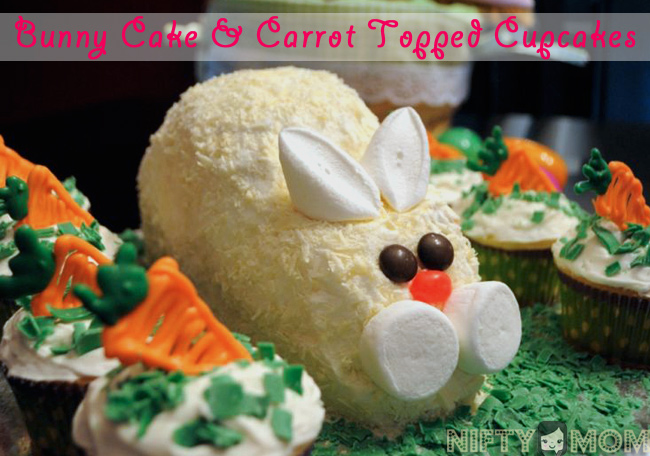
This year I decided to make an Easter Bunny Cake for the first time. I searched around the internet to get some ideas and came across this video on decorating Easter cakes on AllRecipes.com. I thought the bunny idea was super cute and seemed pretty easy. But the “fur” was coconut. There aren’t a lot of coconut fans in my family, so what would I use instead? Nothing? That’s when I decided to use shavings of white chocolate. Then for the “grass” I bought green icing spray and sprayed the shavings before putting them around the cake and on the cupcakes. I wanted to put little carrots on the cupcakes, but I ran low on time. You can click on the picture for a larger view. I was very pleased on how it turned out and now I can’t wait to make and decorate more cakes!
Here’s how to make it:
-1 cake mix of your liking
-2 cans of vanilla/white frosting
-3 Large marshmallows (tail, ears, cheeks)
-2 Chocolate chips or brown M&Ms (eyes)
-1 pink jelly bean (nose)
-1 block of white chocolate (fur, grass)
-Green icing spray
Make the cake mix as directed. The bunny takes one layer of a cake. You can do two bunny cakes or, as I did, one layer of the cake and a dozen cupcakes. Let the cake cool completely before cutting it. It is easier to cut if you refrigerate it first. Cut the cake and ice the halves together standing up in the cut side making the body of the bunny. Cut a notch out in the front where the ears will go and the marshmallows will sit. Ice the cake completely. It took me a lot of icing to cover it good and evenly (that’s why I say 2 cans of icing). It doesn’t have to be perfect because the chocolate shavings will go over it.
Make shavings of the white chocolate. I used a vegetable peeler and it worked great. Take handfuls of the shavings and lightly pat all around your bunny giving him ‘fur’. Set the rest aside. Flatten a large marshmallow and cut it diagonally. Set them with the cut sides out creating the bunny ears. Cut the other marshmallow in half creating the two cheeks. Put the cut end on the cake. Add your eyes and nose. Use the last marshmallow as the tail.
Ice the cupcakes.
Put the rest of the shavings in a container and spray with the green icing spray. You will have to shake the container a few times and repeat to get a good coverage. Sprinkle them on the cupcakes and spread them out around the bunny.
I recommend refrigerating the cake if you are not going to use it immediately to insure the chocolate shavings don’t melt.
