Posts Tagged“Cake Decorating”

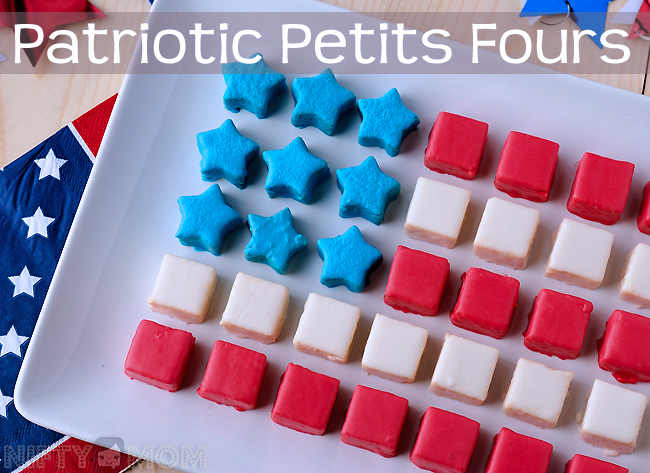
Patriotic Flag Petits Fours Dessert

This patriotic petits fours recipe is a #SLSweetTreats sponsored post for Sara Lee. All opinions are my own.

Memorial day quickly approached and soon it will be The Fourth of July. It makes me think about all the great heroes that serve our country. It makes me proud to be a Marine’s sister and the wife to an incredible man who served in the Navy. Each year, I like to make a patriotic dessert for our celebrations as a tasty treat.

Easy 4th of July Dessert - Petits Fours with Pound Cake

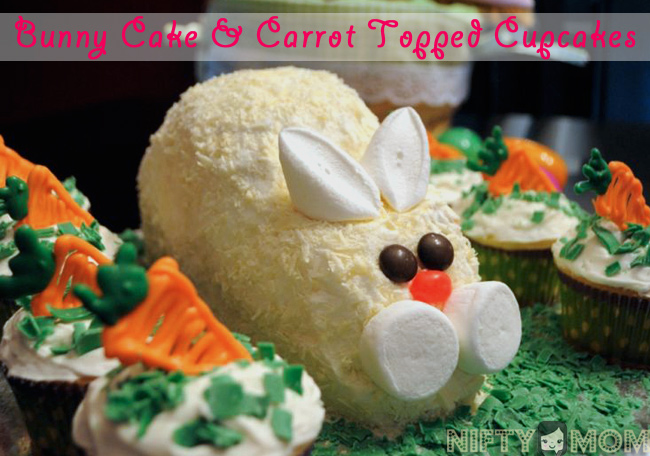
Stand Up Bunny Cake & Carrot Topped Cupcakes {Tutorial}

How to Make a Stand Up Easter Bunny Cake Recipe

A couple years ago when I started Nifty Mom, one of the first posts I wrote was how to make an Easter Bunny Cake (which was adapted from this video I saw). The cake was a huge hit with family and friends plus it’s pretty simple to make. With Easter coming up, I have been thinking about the cake again. Since it was my first attempt at cake decorating and it lacked pictures, I decided to update the tutorial for you with step-by-step pictures and the addition of carrot topped cupcakes.

‘The Amazing Spider-Man’ on VUDU Viewing Party #SpiderManWMT

Last month, you may remember when I pre-purchased ‘The Amazing Spider-Man’ at Walmart. The best part about the pre-purchase was having access to a digital copy of the movie over a week before the DVD release date (11/9). Our family is a huge fan of Spider-Man. My sons are always singing the Spider-Man song and asking to watch the cartoons. We didn’t get a chance to watch it at the theater, so we were excited to be able to watch it before the release date. Since we gained access to our digital copy on October 30th, we decided to throw a Spider-Man Party to watch the new movie and enjoy time with family and friends. I headed to Walmart to pick up some party supplies, food and a Marketside Pizza.
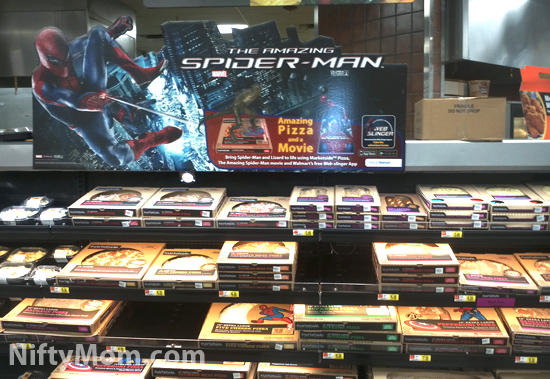
The Amazing Spiderman Party #SpiderManWMTFirst we need a pizza and we picked out a  Marketside 16″ Ultimate Meat pizza with Spider-Man on the box. Walmart is definitely gearing up for the Spider-Man release. They are releasing The Amazing Spider-Man themed Augmented RealityApp with trigger points that will be on the pizza box &  throughout Walmart on displays.

The Amazing Spiderman Party #SpiderManWMT

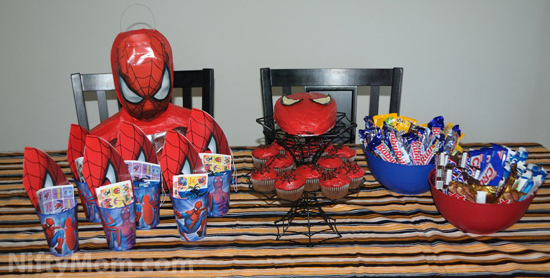
I found a lot of Spider-Man themed party supplies, toys, and apparel throughout the whole store. There was so many different items, I had a hard time picking out just a few.
The Amazing Spiderman Party #SpiderManWMT

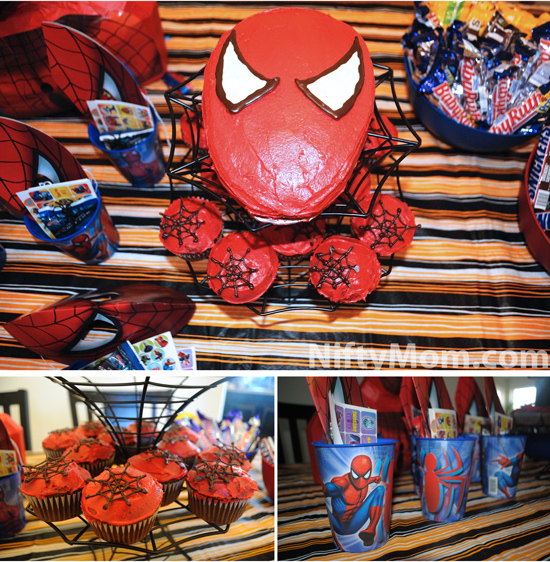
All parties need ‘goodie bags’ for the little ones and this was no exception. I put Spider-Man masks, stickers, fruit snacks, and candies a cup for each of the kids. Since I love decorating cakes, of course I had to make a Spider-Man cake and cupcakes that I displayed on a spiderweb cake stand.
The Amazing Spiderman Party #SpiderManWMT

After icing the cakes with red icing, I used melted chocolate to complete it and add the Spider-Man effect. To do this just melt some chocolate and put it in a sandwich bag (my homemade cake decorating bag). Then snip a very small corner off  the bottom and squeeze it out onto wax paper into spiderweb shapes. When they are all done, put it into the freeze to harden for about 20 minutes. They easily peel off to put on top of the cupcakes. For the cake, I also used melted chocolate to create the eyes. Just pipe the dark chocolate first and after it starts to firm up, fill it in with melted white chocolate.
The Amazing Spiderman Party #SpiderManWMT

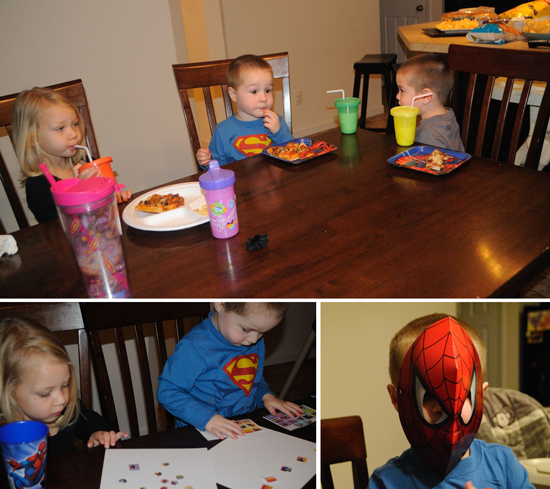
The kids played with stickers, masks, and threw ‘spiders’ at a spiderweb on the wall. We watched ‘The Amazing Spider-Man’ on VUDU and it was amazing. It was over 2 hours though, a little long to watch with kids running around.

Early Access to Spider-Man on VUDU #SpiderManWMT

After the movie, it was a great night to hang out by the fire and enjoy the evening. Spider-Man made a guest appearance ;)

The Amazing Spiderman Party #SpiderManWMT

For the latest news and updates for ‘The Amazing Spider-Man’, make sure to stay connected and follow them on Twitter, become a fan on Facebook, and visit the website.  Did you pre-purchase it yet? You still can to get the access to the digital copy!


“I am a member of the Collective Bias™ Social Fabric® Community.  This shop has been compensated as part of a social shopper insights study for Collective Bias™ and Sony Pictures Home Entertainment #CBias #SocialFabric All opinions expressed are 100% mine.”

Blue’s Clues Cake – Wordless Wednesday

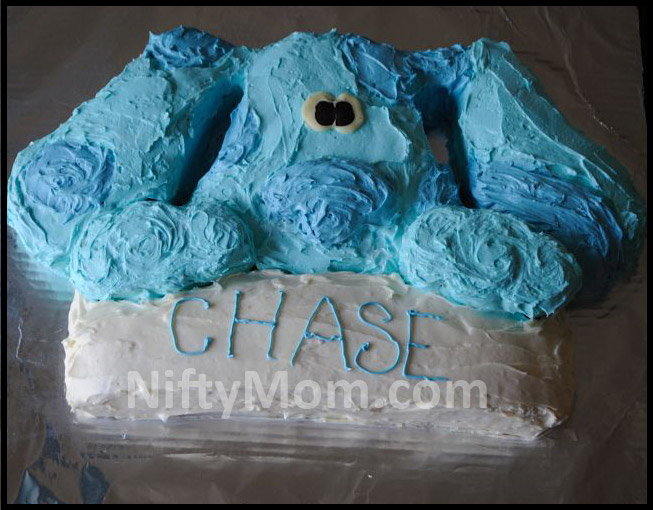
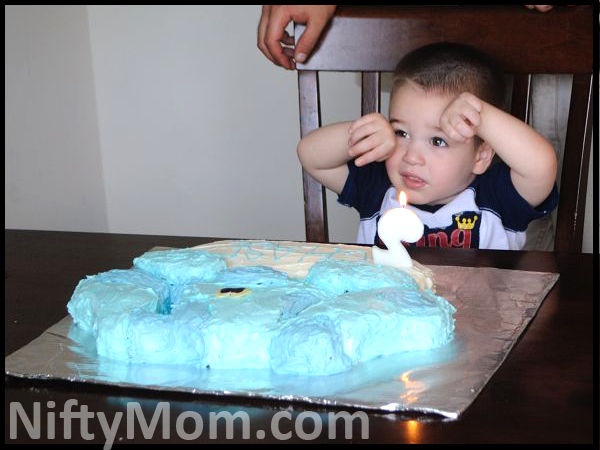
Homemade Blues Clues Cake

My son turned 2 over the weekend and he LOVES Blue’s Clues. So I ended up making him a Blue’s Clues cake because I couldn’t find anywhere to make him one in 2 days (yea, I may have waited until the last minute to try to find one). Anyway, after hours of work (I’m considering writing a ‘how-to’ post at a later time), it ended up better than I thought it would!  As for his reaction… Well, he was all shy from everyone staring at him, so he covered his eyes most of the time. I am not sure he even noticed it was Blue! But it was still worth it.

*I linked up at Random Mommy.

How to Make a Heart Shaped Cake: It’s Quick & Easy

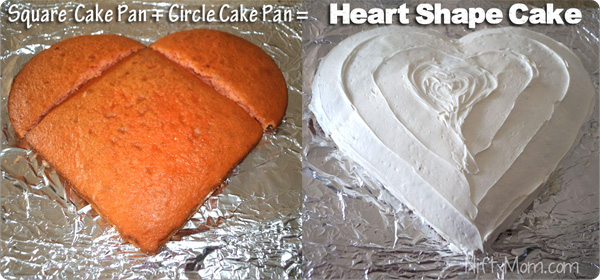
How to Make a Heart Shaped Cake

I love to make cakes and desserts and since Valentine’s Day is right around the corner, I thought I would share how easy it is to make a heart shaped cake.

Need:

  • Box of Cake Mix
  • Can of Frosting
  • 8-9″ Circle Cake Pan
  • 8-9″ Square Cake Pan

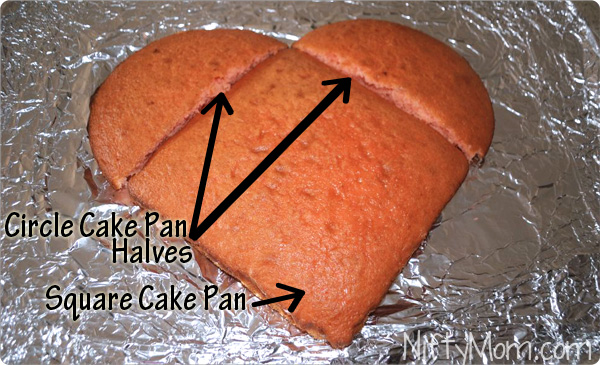
Make the cake mix as directed on the box. Pour half into the circle pan and half into the square pan. Bake as directed. Let cool completely and remove from the pans. If your pans are not easy to get the cake out, line the the pan with foil before you add the cake mix.

Cut the circle cake in half and place the three pieces together as shown:

Easy way to Make a Heart Cake

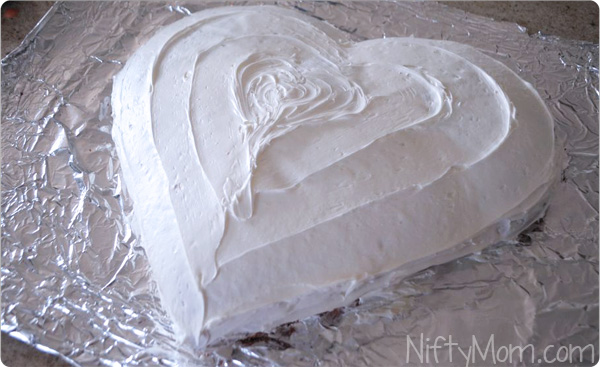
Now all you have to do is ice the cake. The first time I made this, one can of frosting barely covered the cake. It helps to beat the frosting with a mixer for a few minutes to fluff it up a little. This also warms it up slightly, making it easier to spread.

How to Make a Heart Shaped Cake

Wasn’t that easy?


Golf Cake for Father’s Day


Golf Cake

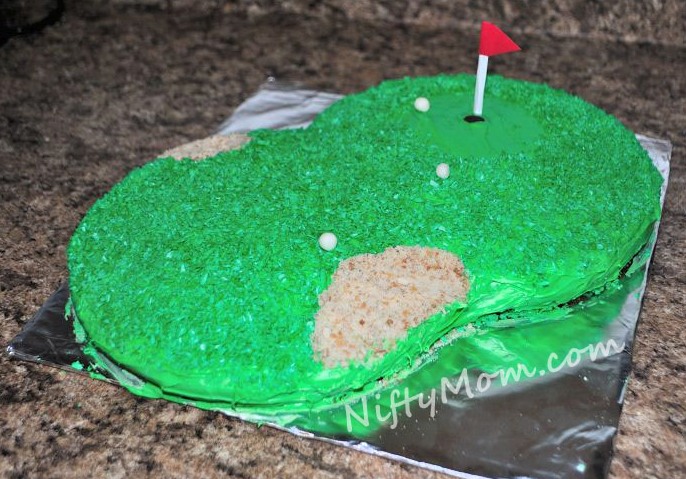
My husband likes to play golf and I saw a cake similar to this on a website awhile back using coconut. I thought I would try to make it with white chocolate shavings instead (The hubby isn’t a big fan of coconut). I am very pleased with the way it turned out!

NEED:

  • Cake Mix
  • Vanilla Icing
  • Icing Color (you can try food coloring, but I heard that can ‘water down’ the icing
  • 4-6 Vanilla Wafers
  • White Chocolate
  • Green Icing Spray (I got at Michaels for a few bucks)
  • 1 Chocolate Chip
  • White gumballs

Bake cake mix as instructed in two round pans. After they cool, I laid them overlapping a little, and cut the overlapping cake. I put the cake on a foil-covered piece of cardboard; You can use a serving platter. Next, dye your icing green and spread over the whole cake.

I didn’t have a block of white chocolate, so I melted a bag of white chocolate chips in a wax paper lined plastic container and froze it making my own little block. Next, make shavings for the grass using a vegetable peeler. Put the shavings in a container and spray them with the green icing color, shaking the over all the shavings. It is easier to do it in small batches. Cover the cake except for where the hole will be and a couple sand dunes. Crumble the vanilla wafers a sprinkle to create sand dunes. First, I push the spots down a little, to get a little depth.

Push a chocolate chip, flat-side up, for the hole. Place a few white gum balls as golf balls. I didn’t have any gum balls, so I barely melted some of the white chocolate and formed little balls. Last is the flag. I didn’t have any pretzels and couldn’t think of anything else to use, so I just rolled up a small piece of white construction paper and used a red piece for the flag.

It isn’t as hard as it looks!


Easter Bunny Cake

This year I decided to make an Easter Bunny Cake for the first time. I searched around the internet to get some ideas and came across this video on decorating Easter cakes on AllRecipes.com. I thought the bunny idea was super cute and seemed pretty easy. But the “fur” was coconut. There aren’t a lot of coconut fans in my family, so what would I use instead? Nothing? That’s when I decided to use shavings of white chocolate. Then for the “grass” I bought green icing spray and sprayed the shavings before putting them around the cake and on the cupcakes. I wanted to put little carrots on the cupcakes, but I ran low on time. You can click on the picture for a larger view. I was very pleased on how it turned out and now I can’t wait to make and decorate more cakes!

Here’s how to make it:

-1 cake mix of your liking
-2 cans of vanilla/white frosting
-3 Large marshmallows (tail, ears, cheeks)
-2 Chocolate chips or brown M&Ms (eyes)
-1 pink jelly bean (nose)
-1 block of white chocolate (fur, grass)
-Green icing spray

Make the cake mix as directed. The bunny takes one layer of a cake. You can do two bunny cakes or, as I did, one layer of the cake and a dozen cupcakes. Let the cake cool completely before cutting it. It is easier to cut if you refrigerate it first. Cut the cake and ice the halves together standing up in the cut side making the body of the bunny. Cut a notch out in the front where the ears will go and the marshmallows will sit. Ice the cake completely. It took me a lot of icing to cover it good and evenly (that’s why I say 2 cans of icing). It doesn’t have to be perfect because the chocolate shavings will go over it.

Make shavings of the white chocolate. I used a vegetable peeler and it worked great. Take handfuls of the shavings and lightly pat all around your bunny giving him ‘fur’. Set the rest aside. Flatten a large marshmallow and cut it diagonally. Set them with the cut sides out creating the bunny ears. Cut the other marshmallow in half creating the two cheeks. Put the cut end on the cake. Add your eyes and nose. Use the last marshmallow as the tail.

Ice the cupcakes.

Put the rest of the shavings in a container and spray with the green icing spray. You will have to shake the container a few times and repeat to get a good coverage. Sprinkle them on the cupcakes and spread them out around the bunny.

I recommend refrigerating the cake if you are not going to use it immediately to insure the chocolate shavings don’t melt.

 **UPDATED POST: CLICK HERE FOR PICTURE TUTORIAL**