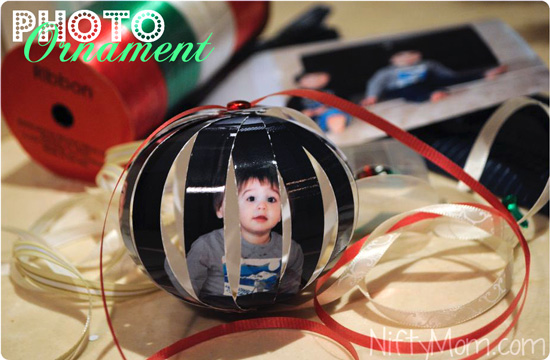
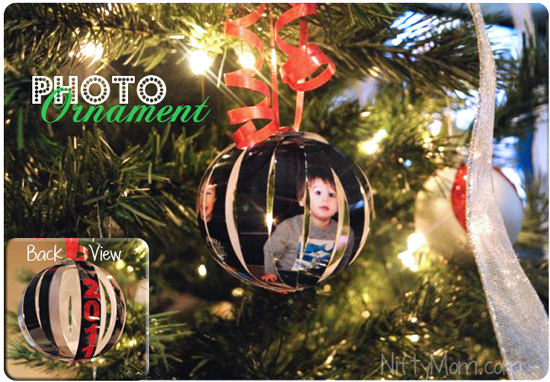
Two years ago I attempted to start a tradition at Christmas. Each year I want to make a new ornament capturing my kids (See the photo ornament I made the first year here). I say attempted because last year I failed. But I had a good excuse… We moved into our new house on Dec 8th and had to unpack, decorate, host 3 holiday parties AND I was eight months pregnant. It was pretty stressful and the ornament was the last thing on my mind. So this year I plan on making two, one with a photo from last year and a new one for this year. This is the ornament I just made for last year with a photo from Dec 2011.
SUPPLIES NEEDED:
- 5×7″ Photo
- Paper Cutter
- Single Hole Punch
- Brads
- Ribbon
- Scissors
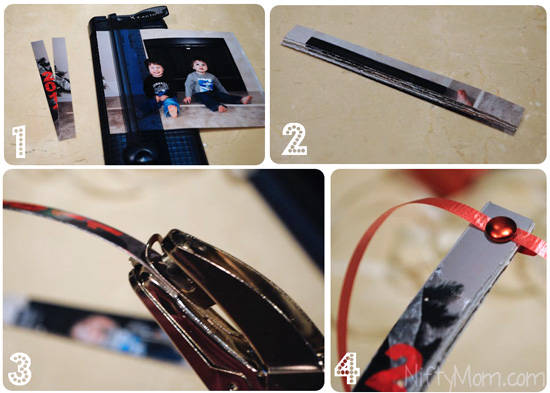
- Cut the photo into 1/2″ strips. They do not have to be perfect or exact. You will have a small leftover piece at the end. Note: I added the “2011” in Photoshop, but you can add the year with a marker if desired.
- Make sure to keep the strips in order. Stack them up (mine are from right to left)
- Use a single hole punch on each end of the strips. I don’t have a heavy-duty hole punch, so I had to do 2-3 at a time. The best way to do this: Use one as a template/marker. I used the last strip and punched two with it each time. If you don’t, they most likely will not line up. Again, make sure you keep them in order.
- Insert brads into the holes to secure the strips together in order. If you are using curling ribbon, put it over the top hole and push the brad through it. (fabric ribbon can be tied on)
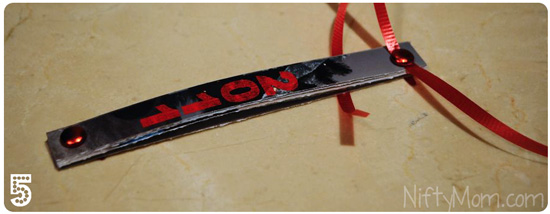
- This is what it should look like. Notice the strips are not perfect. This is fine!
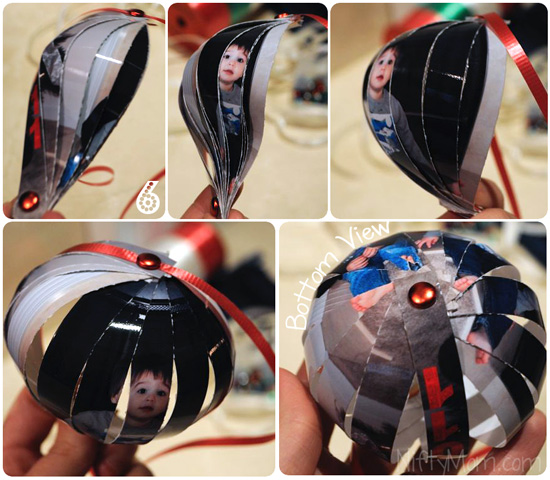
- Fan out the strips slowly and carefully. This step takes some patience. Make sure to fan them in the correct direction. I have the left end on the top, so I fanned the strips to the right starting at the bottom (I did mess this up before and it is very difficult to fix). Work the strips around until you get them all around and the ornament has the look you want.
- Tie the ribbon to desired length. Hang and enjoy or give as a gift!
**CLICK HERE TO RE-PIN FOR LATER**
