Browsing CategoryDesserts

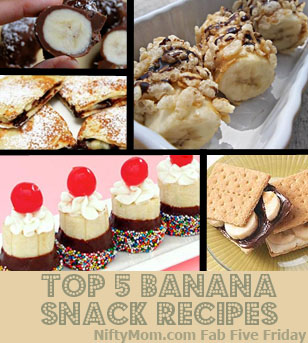
Fab Five Friday – Top 5 Banana Snack Recipes

Quick Easy Banana Snack Recipes

Bananas are one of my little guys’ favorite snack foods and I am always looking for ways to jazz it up. These are some of my favorite banana snack recipes I have came across.

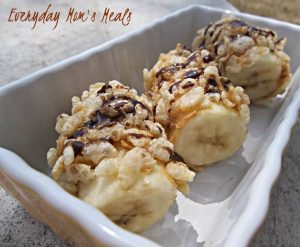
1. Crispy Chocolate Peanut Butter Banana Bites: These add a great twist to banana snacks with their crispiness. View the recipe here.

Easy Banana Snacks
Recipe & Photo courtesy of FormulaMom.com

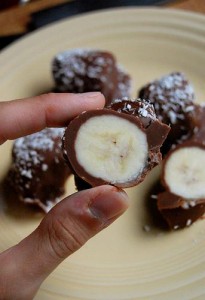
2. Frozen Banana Bites: The kids love these! Dip frozen banana pieces in  a mixture of melted chocolate and peanut butter. Ashley adds coconut flakes, but I leave them off. She has lots of great tips and variations included with her recipe.  View them here.

Frozen Banana Bites
Recipe and Photo Courtesy of NeverHomeMaker.com

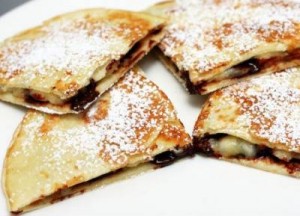
3. Chocolate Banana Crepes: These are also good using Nutella instead of chocolate chips as well. View the recipes here along with 21 other healthy kids snacks.

Easy Banana Crepes Recipes
Recipe and Photo Courtesy of Parenting.com

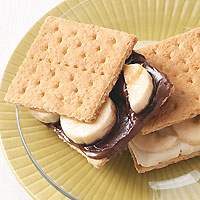
4. Banana & Nutella Graham Cracker Sandwiches: Banana slices and Nutella is also good on toast. There is no recipe on the site, but you can also view some other healthy snack ideas.

Quick Easy Banana Snack Recipes
Photo Courtesy of TasteofHome.com

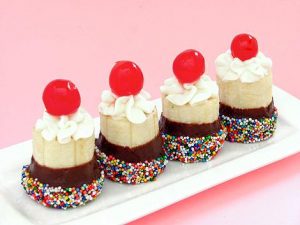
5. Banana Split Bites: I haven’t tried these yet, but just look at how yummy they look! Scoop out the inside of the banana bites and put ice cream in them. Naomi has a lot of great recipes! View this one here.

Banana Split Mini Bites Recipes
Recipe and Photo Courtesy of BakersRoyale.com

Do you have a favorite banana snack?


How to Make a Heart Shaped Cake: It’s Quick & Easy

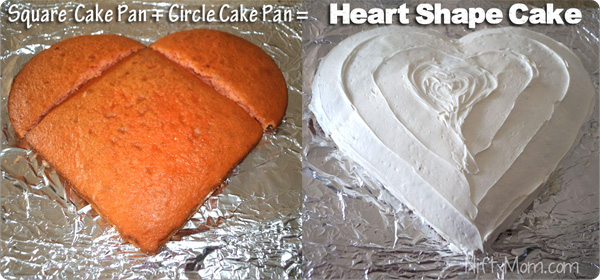
How to Make a Heart Shaped Cake

I love to make cakes and desserts and since Valentine’s Day is right around the corner, I thought I would share how easy it is to make a heart shaped cake.

Need:

  • Box of Cake Mix
  • Can of Frosting
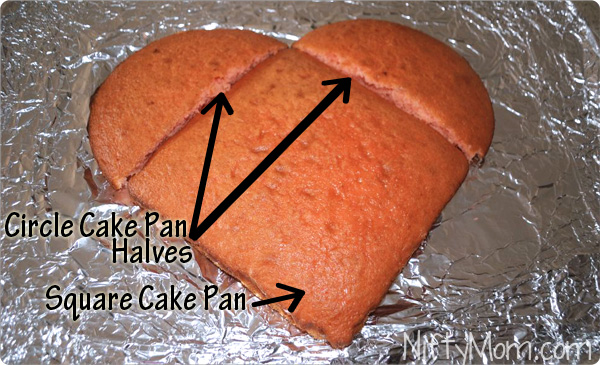
  • 8-9″ Circle Cake Pan
  • 8-9″ Square Cake Pan

Make the cake mix as directed on the box. Pour half into the circle pan and half into the square pan. Bake as directed. Let cool completely and remove from the pans. If your pans are not easy to get the cake out, line the the pan with foil before you add the cake mix.

Cut the circle cake in half and place the three pieces together as shown:

Easy way to Make a Heart Cake

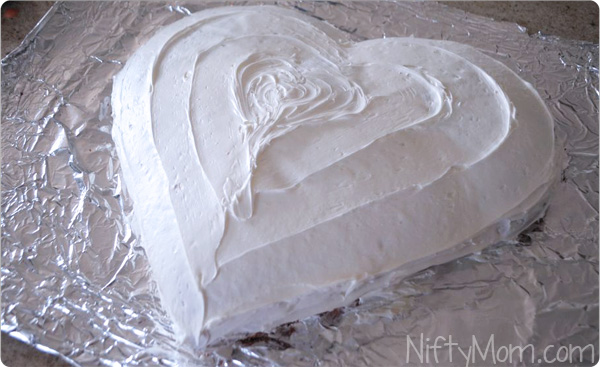
Now all you have to do is ice the cake. The first time I made this, one can of frosting barely covered the cake. It helps to beat the frosting with a mixer for a few minutes to fluff it up a little. This also warms it up slightly, making it easier to spread.

How to Make a Heart Shaped Cake

Wasn’t that easy?


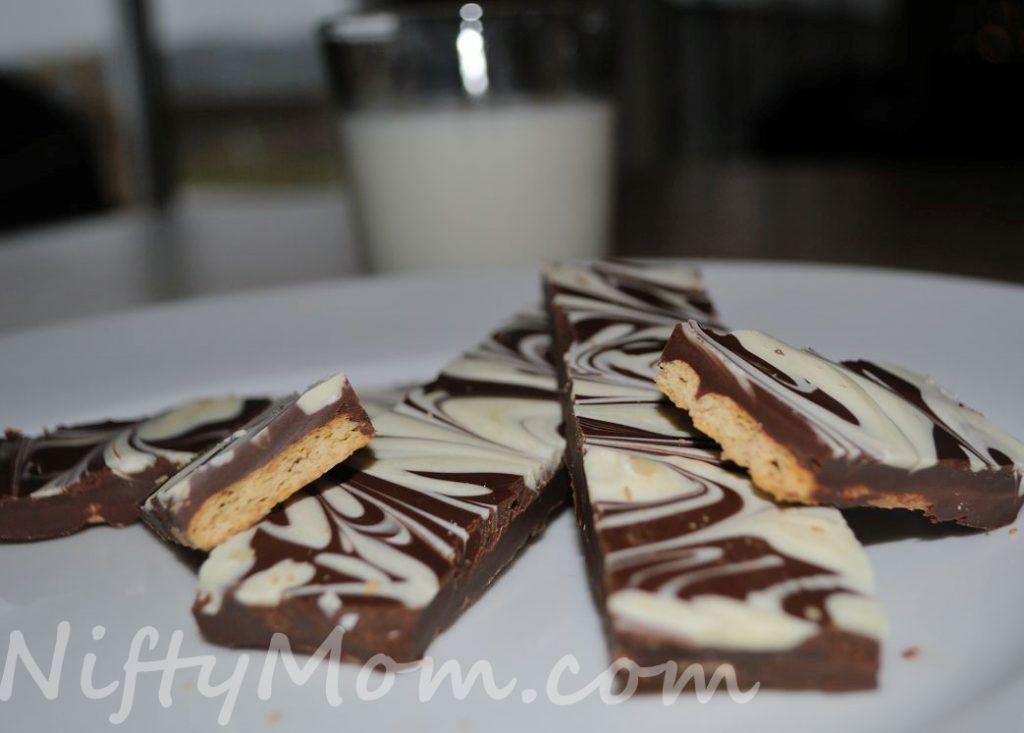
Quick & Easy Marbled Chocolate Treats Recipe

Marbled Chocolate Treats

I received this recipe in an email from Kraft Foods and had to make them. These treats are easy to prepare and extremely yummy!

INGREDIENTS:

  • 8 1/2 Graham Crackers
  • 6 squares of Bakers Semisweet Chocolate
  • 1/2 cup of Peanut Butter
  • 3 squares of Bakers White Chocolate

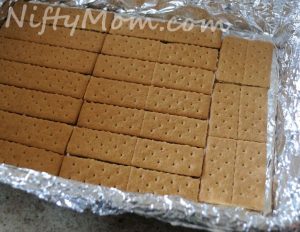
Line a 9×13″ baking pan with foil. Break seven whole graham crackers in half, vertically and one cracker in half horizontally. Place them in the pan as shown in the picture.

Marbled Chocolate Treats

Microwave semisweet chocolate squares and peanut butter. I used a measuring cup so it would be easy to pour over the graham crackers. Microwave for about 2 minutes until completely mixed and melted, stirring every 30 seconds. Pour and spread over the graham crackers.

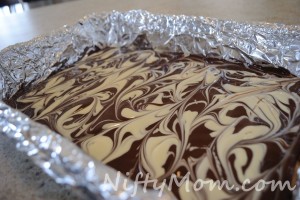
Microwave the 3 squares of white chocolate for about 1 minute, stirring after 30 seconds. Drop spoonfuls of white chocolate all over the chocolate mixture. Then use a butter knife and swirl around to create a marbled effect.

Marbled Chocolate Treats Swirl

Place in the refrigerator for at least an hour or until firm. Lift foil out of pan. The best way to cut it into pieces is to flip the whole thing over on the foil. You will be able to see the graham crackers as you laid them out and just use a knife to cut through the chocolate. I stored mine in the refrigerator after they were cut so they didn’t melt.

Enjoy!


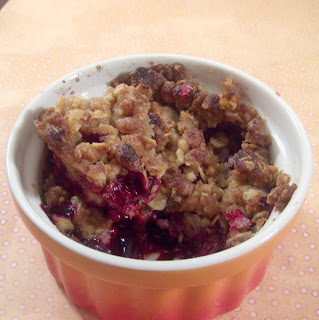
Berry Crisp Recipe – Guest Post

Recipe Guest Post today from Greta over at How Was Your Day. This is a great dessert or breakfast. 

Ingredients:

  • 2 12-ounce bags frozen berries (blackberries, blueberries, raspberries or a mix)
  • 2 tbs Cornstarch
  • 1 tsp Lemon Juice
  • ½ cup butter or margarine, softened
  • ¾ cup brown sugar
  • ¾ cup flour
  • ¾ cup rolled oats
  • ¼ tsp salt
  • 1½ tsp cinnamon
  • ½ tsp ginger

A couple of ingredient notes: You can use fresh berries. They’re gonna get cooked down, though, so I use frozen and save the fresh ones for a recipe where presentation matters.

This is a little more on the tart side. That’s my preference and it sweetens up nicely with ice cream or whipped cream. However, you could add a couple tablespoons of sugar to the berries for a sweeter crumble.

Directions:

Preheat oven to 425 degrees. In a bowl, combine the frozen berries, cornstarch, and lemon juice. Stir to coat the berries in the cornstarch, and divide the berry mixture between 6 ramekins. Place on a cookie sheet.

Put softened butter in a mixing bowl. Add brown sugar, flour, oats, and spices.

Using a fork, break up the butter, and mash everything together. It should be crumbly; it can have little pea sized lumps for butter, but you want all of the ingredients incorporated. (I mash it so the butter squishes between the tines of the fork, giving it a little stir every so often. If you keep squishing and mashing, it will take about 2 or 3 minutes to mix the topping.)

When the topping is mixed, start spooning it over the berries, trying to distribute evenly over the tops, with a similar amount on each crisp.

Put your cookie sheet with the individual crisps in the oven. Immediately turn the heat down to 350 degrees. Bake for about 20 minutes until the berry filling is bubbly, and the tops are nicely browned. If the tops are getting too dark, cover them with foil, and turn the oven down to 325 degrees.

Remove from oven and let cool about 30 minutes. Great when served with ice cream, whipped cream, or even plain!

Optional – you can put the berries into an 8 inch pan, then cover with the topping. Bake at 350 degrees for about 30-40 minutes, till the center is bubbly.

**About the Author**

How Was Your Day is the chronicles of a 20-something gal about town. Greta likes style, creating, travel, and hockey.  She also cannot resist anything that has chocolate and peanut butter combined.

**Visit Greta over at How Was Your Day or on Facebook**

Golf Cake for Father’s Day


Golf Cake

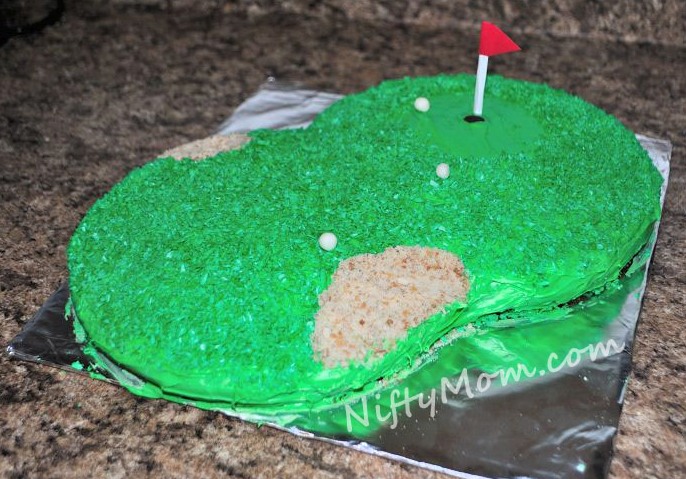
My husband likes to play golf and I saw a cake similar to this on a website awhile back using coconut. I thought I would try to make it with white chocolate shavings instead (The hubby isn’t a big fan of coconut). I am very pleased with the way it turned out!

NEED:

  • Cake Mix
  • Vanilla Icing
  • Icing Color (you can try food coloring, but I heard that can ‘water down’ the icing
  • 4-6 Vanilla Wafers
  • White Chocolate
  • Green Icing Spray (I got at Michaels for a few bucks)
  • 1 Chocolate Chip
  • White gumballs

Bake cake mix as instructed in two round pans. After they cool, I laid them overlapping a little, and cut the overlapping cake. I put the cake on a foil-covered piece of cardboard; You can use a serving platter. Next, dye your icing green and spread over the whole cake.

I didn’t have a block of white chocolate, so I melted a bag of white chocolate chips in a wax paper lined plastic container and froze it making my own little block. Next, make shavings for the grass using a vegetable peeler. Put the shavings in a container and spray them with the green icing color, shaking the over all the shavings. It is easier to do it in small batches. Cover the cake except for where the hole will be and a couple sand dunes. Crumble the vanilla wafers a sprinkle to create sand dunes. First, I push the spots down a little, to get a little depth.

Push a chocolate chip, flat-side up, for the hole. Place a few white gum balls as golf balls. I didn’t have any gum balls, so I barely melted some of the white chocolate and formed little balls. Last is the flag. I didn’t have any pretzels and couldn’t think of anything else to use, so I just rolled up a small piece of white construction paper and used a red piece for the flag.

It isn’t as hard as it looks!


Easter Bunny Cake

This year I decided to make an Easter Bunny Cake for the first time. I searched around the internet to get some ideas and came across this video on decorating Easter cakes on AllRecipes.com. I thought the bunny idea was super cute and seemed pretty easy. But the “fur” was coconut. There aren’t a lot of coconut fans in my family, so what would I use instead? Nothing? That’s when I decided to use shavings of white chocolate. Then for the “grass” I bought green icing spray and sprayed the shavings before putting them around the cake and on the cupcakes. I wanted to put little carrots on the cupcakes, but I ran low on time. You can click on the picture for a larger view. I was very pleased on how it turned out and now I can’t wait to make and decorate more cakes!

Here’s how to make it:

-1 cake mix of your liking
-2 cans of vanilla/white frosting
-3 Large marshmallows (tail, ears, cheeks)
-2 Chocolate chips or brown M&Ms (eyes)
-1 pink jelly bean (nose)
-1 block of white chocolate (fur, grass)
-Green icing spray

Make the cake mix as directed. The bunny takes one layer of a cake. You can do two bunny cakes or, as I did, one layer of the cake and a dozen cupcakes. Let the cake cool completely before cutting it. It is easier to cut if you refrigerate it first. Cut the cake and ice the halves together standing up in the cut side making the body of the bunny. Cut a notch out in the front where the ears will go and the marshmallows will sit. Ice the cake completely. It took me a lot of icing to cover it good and evenly (that’s why I say 2 cans of icing). It doesn’t have to be perfect because the chocolate shavings will go over it.

Make shavings of the white chocolate. I used a vegetable peeler and it worked great. Take handfuls of the shavings and lightly pat all around your bunny giving him ‘fur’. Set the rest aside. Flatten a large marshmallow and cut it diagonally. Set them with the cut sides out creating the bunny ears. Cut the other marshmallow in half creating the two cheeks. Put the cut end on the cake. Add your eyes and nose. Use the last marshmallow as the tail.

Ice the cupcakes.

Put the rest of the shavings in a container and spray with the green icing spray. You will have to shake the container a few times and repeat to get a good coverage. Sprinkle them on the cupcakes and spread them out around the bunny.

I recommend refrigerating the cake if you are not going to use it immediately to insure the chocolate shavings don’t melt.

 **UPDATED POST: CLICK HERE FOR PICTURE TUTORIAL**