Coffee has always been one of my favorite beverages. Not a day goes by where I don’t enjoy at least one cup. When I think of coffee, I always think of Starbucks. If I am out running errands, I cannot resist driving through a Starbucks drive-thru for a fresh cup of deliciousness. When it comes to drinking coffee at home, I still can depend on Starbucks to get me through the day.
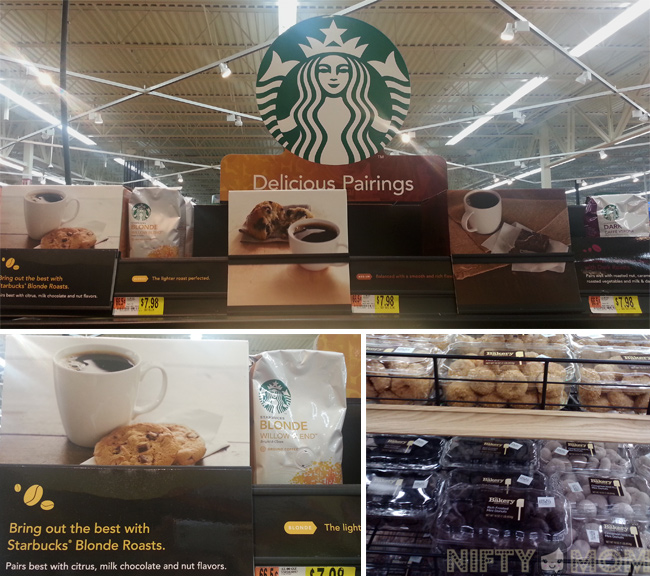
Delicious Pairings
When I was at Walmart over the weekend, I notice a Starbucks display in the Bakery section. Of course, I naturally gravitate to it.
The ‘Delicious Pairings’ display briefly described the different roasts (light, medium, dark). It then gives you what pairs best with that roast to bring out the best flavors in the coffee. I use to only drink dark roasts, but lately I have discovered the delicate tastes of light roasts, so I decided to grab a bag of Starbucks Blonde Willow Blend.
The suggested pairings included citrus, milk chocolate and nut flavors. I am always craving some chocolate donuts, so that works perfect for me. The only ones that I could find at the Bakery at Walmart were Rich Frosted Mini Donuts.
The next morning, I started my day with two cups of my new Blonde Willow roast. It was easy to drink without being overpowering. The flavors in the coffee are delicately bright. It is a great addition to my coffee stash (yes, I have a lot of different roasts and flavors I keep in stock).
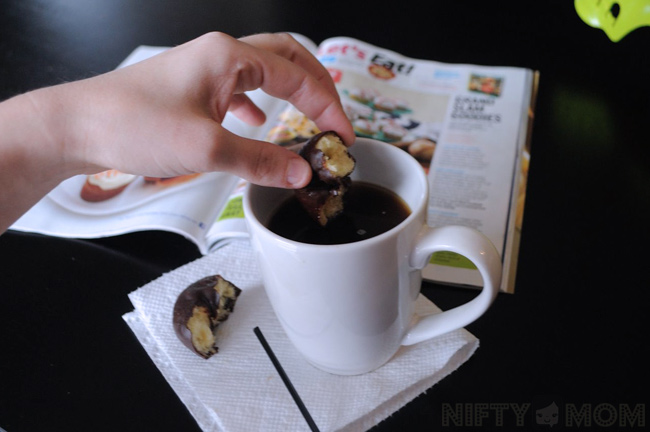
Now, when I normally drink coffee, I am doing five things, trying to feed the kids, clean the kitchen, do laundry, etc. I don’t always get to enjoy the true flavors of each cup. So that day, after I got two of the boys down for their afternoon naps, I decided to take a 15-minute break for some ‘me-time’. I brewed another cup of the Starbucks Blonde Willow and pulled out my Mini Chocolate Donuts from The Bakery at Walmart. While reading a magazine, I slowing enjoyed my cup of coffee while dipping my donuts into the coffee. After just my first few bites and sip of coffee, I instantly noticed a light citrus flavor in the coffee. The chocolate really brought out more intense flavors to enjoy as I was relaxing. It was a great afternoon pick-me-up. I need to do that more often!
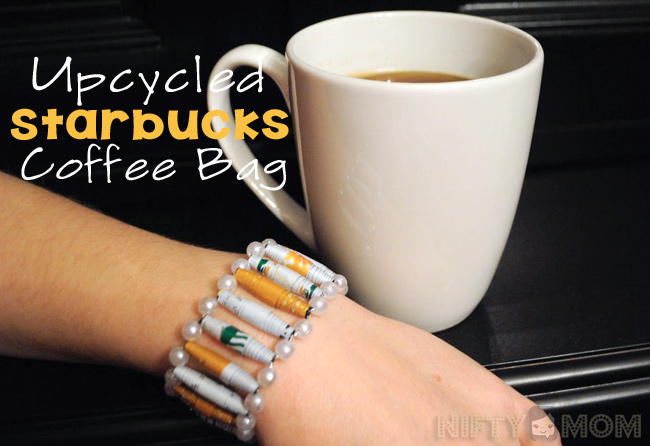
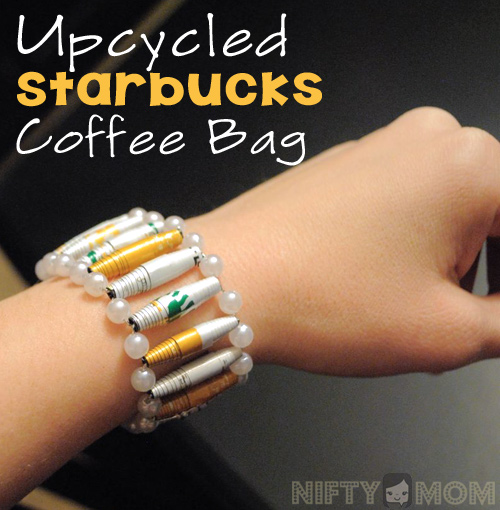
When I was told it was National Crafting Month, I realized I haven’t craft in a few months (my last craft article was a Christmas one, yikes!). So I was thinking it is time to do one. I was checking out the Starbucks coffee bag and couldn’t help but notice all the amazing colors. That’s when I decided to upcyle the bag to make a bracelet. I use to make jewelry all the time awhile back but never thought about upcycling old coffee bags until now.
How to Make Beads from a Coffee Bag
Supplies Needed:
- Empty Coffee Bag(s)
- Ruler
- Thin Permanent Marker
- Scissors
- Thin Coffee Stirrers
- Hot Glue Gun
- Modge Podge
- Brush
- Paper Plate or Styrofoam
- Thin Elastic String
- Accent Beads
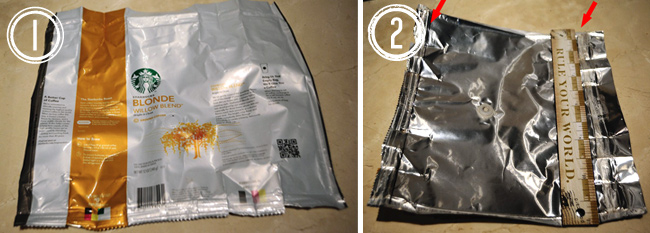
- Gently open the empty coffee bag at all seams and wipe the inside with a wet cloth & dry.
- Cut each side to remove all seams on the sides.
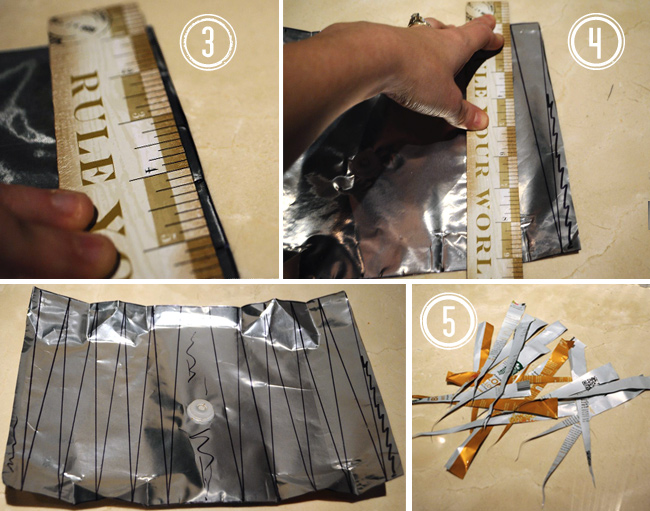
- Measure and mark one inch sections across the top on the back side (or inside) of the coffee bag. Then measure a half an inch in on the other side followed by all one inch markings. This way your marks are staggered from top to bottom and no lined up.
- Draw your lines by connecting your markings as shown above. The two edges and middle piece are scribbled out because those are no usable pieces.
- Cut the strips out.
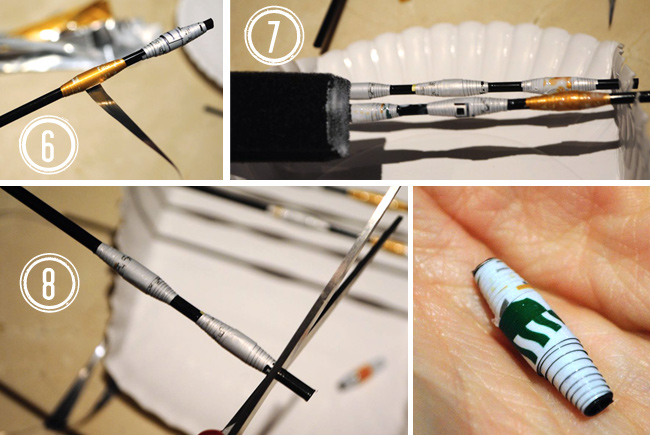
- Roll the strips around a coffee stirrer starting with the wide side. You want to get it as tight as possible. Once you have a couple inches left, put a very small line of hot glue and roll and hold tight. After it about 30 seconds, cut the access off. I put four beads on stirrer. Repeat with all. It gets easier the more you do so be patient.
- Cover each bead with modge podge. You will need somewhere to place it while it dries. You can stick the stirrers in a block of Styrofoam or use a paper plate with two opposite sides folded up with small slits cut out.
- After it dries (about 15-20 minutes) cut each bead. Snip the stirrer as close as you can to the bead.
How to Make a Upcyled Bracelet
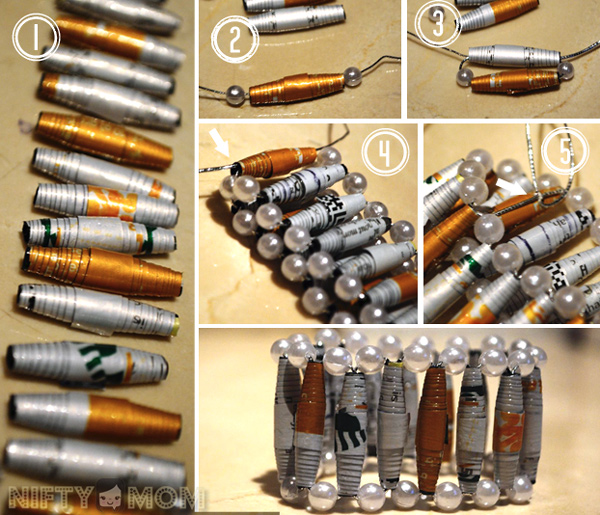
- Line the beads up in the order that you want them. I used 17 beads for mine, but I have small wrists. You may need to use two coffee bags for more beads to make a larger one. Select an accent bead.
- Cut a very long piece of elastic string. Start with one accent bead, a coffee bag bead, and another accent bead. Make sure it is in the middle of the string. You will need a lot to work with.
- Lay the next bead above the first one. Take the left string and put it through the next bead and then the right side. So, basically they cross in the bead. Put an accent bead on each side. Repeat this step until you have to desired length. End with an accent bead on each side.
- After you put the last one on, take each side and put it through the first bead you started with.
- Take the the two ends and tie a knot tight on the inside of the bracelet and trim. I like to put a dot of super glue over the knot.
Now wear your creation with pride! I love the outcome so much that I purchase a few other Starbucks bags because they have awesome colors. Hopefully I will share those with you at a later date!
Happy National Crafting Month!
“I am a member of the Collective Bias® Social Fabric® Community. This shop has been compensated as part of a social shopper insights study for Collective Bias™. #cbias #SocialFabric All opinions expressed are 100% my own.”
