SamanthaPosts Written By

Couponing 101 – Weekly Tips & Techniques

Since I have started my blog, I have had numerous questions regarding couponing. I was going to write a post all about couponing, but then I realized there are so many aspects of couponing and it would take forever to write it all up in one post and I don’t think anyone would want to read all that at once (I sure wouldn’t).

So weekly, I will post a new tip or technique that pertains to couponing.

Here are the current posts in the series

If you have any suggestions or questions, feel free to contact me!


Mother’s Day Gift Idea – Handprint Flower

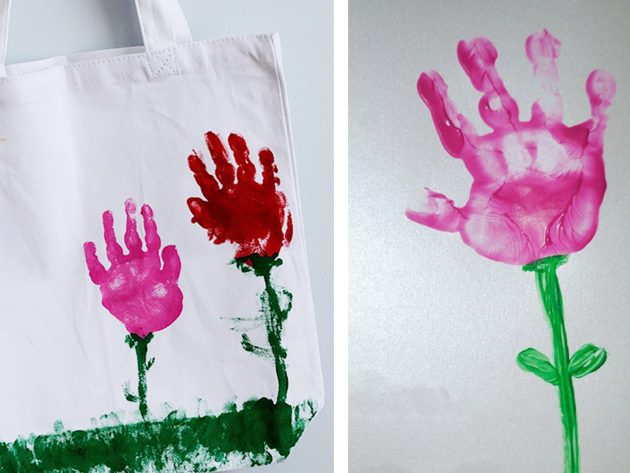
Finger Paint Handprint FlowerIf you are looking for something cute to do with your toddlers or kids for Mother’s Day, this is easy and there are so many things you can do with it! Use pink or red finger paint for the ‘flower’ and paint a stem/grass (this was the best I got out from my 22 month old). I always use card stock instead of copy paper, because it is thicker and shouldn’t warp from the paint.

Here are some different ideas you can do for gifts for Moms, Grandmas, etc.:

  • Make a card with the flower on the cover
  • Attach a picture of your little one next to the flower and frame it
  • Do some ‘flowers’ on wrapping paper for the present or on a gift bag

Nifty Tip:

I always take a picture of the artwork and upload it on my computer. Then not only is it forever saved, but you can use it to print copies, make photo gifts (mug, shirt, mouse pad, etc), or use it in a photo book.

***Click here for another finger paint gift I did with my son.

***Or you can make a Handprint Sun or Footprint Butterflies.

UPDATE: Check out the Handprint Tote Bags we made!


Father’s Day Gift Idea – Framed Finger Paint Picture

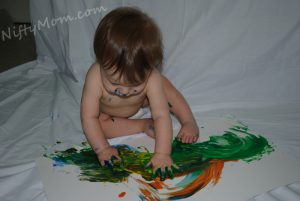
I came up with this idea for a gift for my husband last Fathers Day. Our son was 11 months old at the time and I decided it was time for him to do his first artwork and finger paint. It was so much fun and so easy to do!

NEED:

  • Crayola Washable Fingerpaints
  • Poster Board
  • Waterproof mattress protector ($10-$15 at Target) – Easy clean up, a great back drop, & reusable
  • Camera
  • Picture frame
  • Tape

I draped the sheet over a table so it was a background and covered the floor area.

I put down one paint color at a time and let him paint. And after it was all done, I was very happy with his artwork! It was perfect to use as a picture mat. *Nifty Tip: Take a picture of the finished artwork. This way you can use it as a digital background or just have a copy of it.

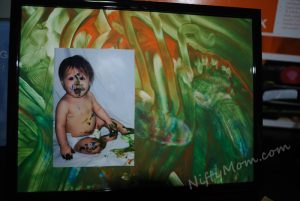
I picked my favorite section and cut out the size of the frame I was using. *Nifty Tip: Take the frame (with the backing and inserts removed) and hold it over the artwork to see what it will look like before you start cutting.

I then picked my favorite picture (which was not easy, there were too many good ones!) and cut it to down, allowing more room to see the painting. Tape to picture anywhere on the painting and put it in the frame.  Now you have a wonderful gift or decor you can keep for yourself!Other Ideas you can do with the left over artwork:

  • Make another frame or two
  • Use it as a scrapbook background and scrapbook the pictures you took
  • Use a section on a homemade greeting cards

Paint Color Ideas:

  • I used green, orange, and blue because it was for my husband
  • Use red, white, pink, purple for Mothers Day, Valentines Day
  • Use pastels for a spring picture
  • The possibilities are endless :)

***See the hand print flower I did with my son for more ideas.


AMF Kids Free Bowling Summer Unplugged

AMF has a great free bowling program for kids all summer long. After you sign up, every week you receive two free bowling passes for each day per each child.

They also have a Summer 17 Plus Pass that can be purchased for$27.95 which allows adults (with children signed up for the free bowling) to get two free games each day as well. It is for up to 4 adults 17 and older.

*Shoe rental not included


St. Louis Readers – Local bowling alleys are AMF Dick Weber Lanes in Florissant, AMF Strike N Spare Lanes in St. Louis, and AMF Bowland Lanes in Granite City.

**Another free bowling program for kids is Kids Bowl Free.

Easter Bunny Cake

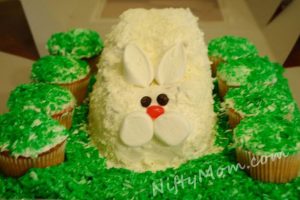
This year I decided to make an Easter Bunny Cake for the first time. I searched around the internet to get some ideas and came across this video on decorating Easter cakes on AllRecipes.com. I thought the bunny idea was super cute and seemed pretty easy. But the “fur” was coconut. There aren’t a lot of coconut fans in my family, so what would I use instead? Nothing? That’s when I decided to use shavings of white chocolate. Then for the “grass” I bought green icing spray and sprayed the shavings before putting them around the cake and on the cupcakes. I wanted to put little carrots on the cupcakes, but I ran low on time. You can click on the picture for a larger view. I was very pleased on how it turned out and now I can’t wait to make and decorate more cakes!

Here’s how to make it:

-1 cake mix of your liking
-2 cans of vanilla/white frosting
-3 Large marshmallows (tail, ears, cheeks)
-2 Chocolate chips or brown M&Ms (eyes)
-1 pink jelly bean (nose)
-1 block of white chocolate (fur, grass)
-Green icing spray

Make the cake mix as directed. The bunny takes one layer of a cake. You can do two bunny cakes or, as I did, one layer of the cake and a dozen cupcakes. Let the cake cool completely before cutting it. It is easier to cut if you refrigerate it first. Cut the cake and ice the halves together standing up in the cut side making the body of the bunny. Cut a notch out in the front where the ears will go and the marshmallows will sit. Ice the cake completely. It took me a lot of icing to cover it good and evenly (that’s why I say 2 cans of icing). It doesn’t have to be perfect because the chocolate shavings will go over it.

Make shavings of the white chocolate. I used a vegetable peeler and it worked great. Take handfuls of the shavings and lightly pat all around your bunny giving him ‘fur’. Set the rest aside. Flatten a large marshmallow and cut it diagonally. Set them with the cut sides out creating the bunny ears. Cut the other marshmallow in half creating the two cheeks. Put the cut end on the cake. Add your eyes and nose. Use the last marshmallow as the tail.

Ice the cupcakes.

Put the rest of the shavings in a container and spray with the green icing spray. You will have to shake the container a few times and repeat to get a good coverage. Sprinkle them on the cupcakes and spread them out around the bunny.

I recommend refrigerating the cake if you are not going to use it immediately to insure the chocolate shavings don’t melt.

 **UPDATED POST: CLICK HERE FOR PICTURE TUTORIAL**

Free Admission to Public Gardens May 6th

National Public Garden Day

National Public Garden DayMay 6th is National Public Gardens Day.

To celebrate, you can get free admission into one of the many public gardens on the list. All you have to do is sign up for a Better Homes and Gardens newsletter, choose which garden (listed by state) you will be going to, how many will be going with you, and after you submit it, you can print your voucher.

STL Readers: Botanical Gardens is included!

NIFTY TIP:

Create a ‘junk’ email account that you use when you sign up for newsletters or websites for coupons. This way your personal email account doesn’t get overloaded.